Sometimes I don't feel like doing things around the house at all. Then a person comes in and asks if I need help and it can make all the difference in the world. Not too long ago Justin was over and saw my curtain rod out, unpacked, but also collecting dust. He asked if I wanted to put it up right now. Right now?! Don't worry, I bought it back in July. Sometimes that is just the push that I need in order to get things done.
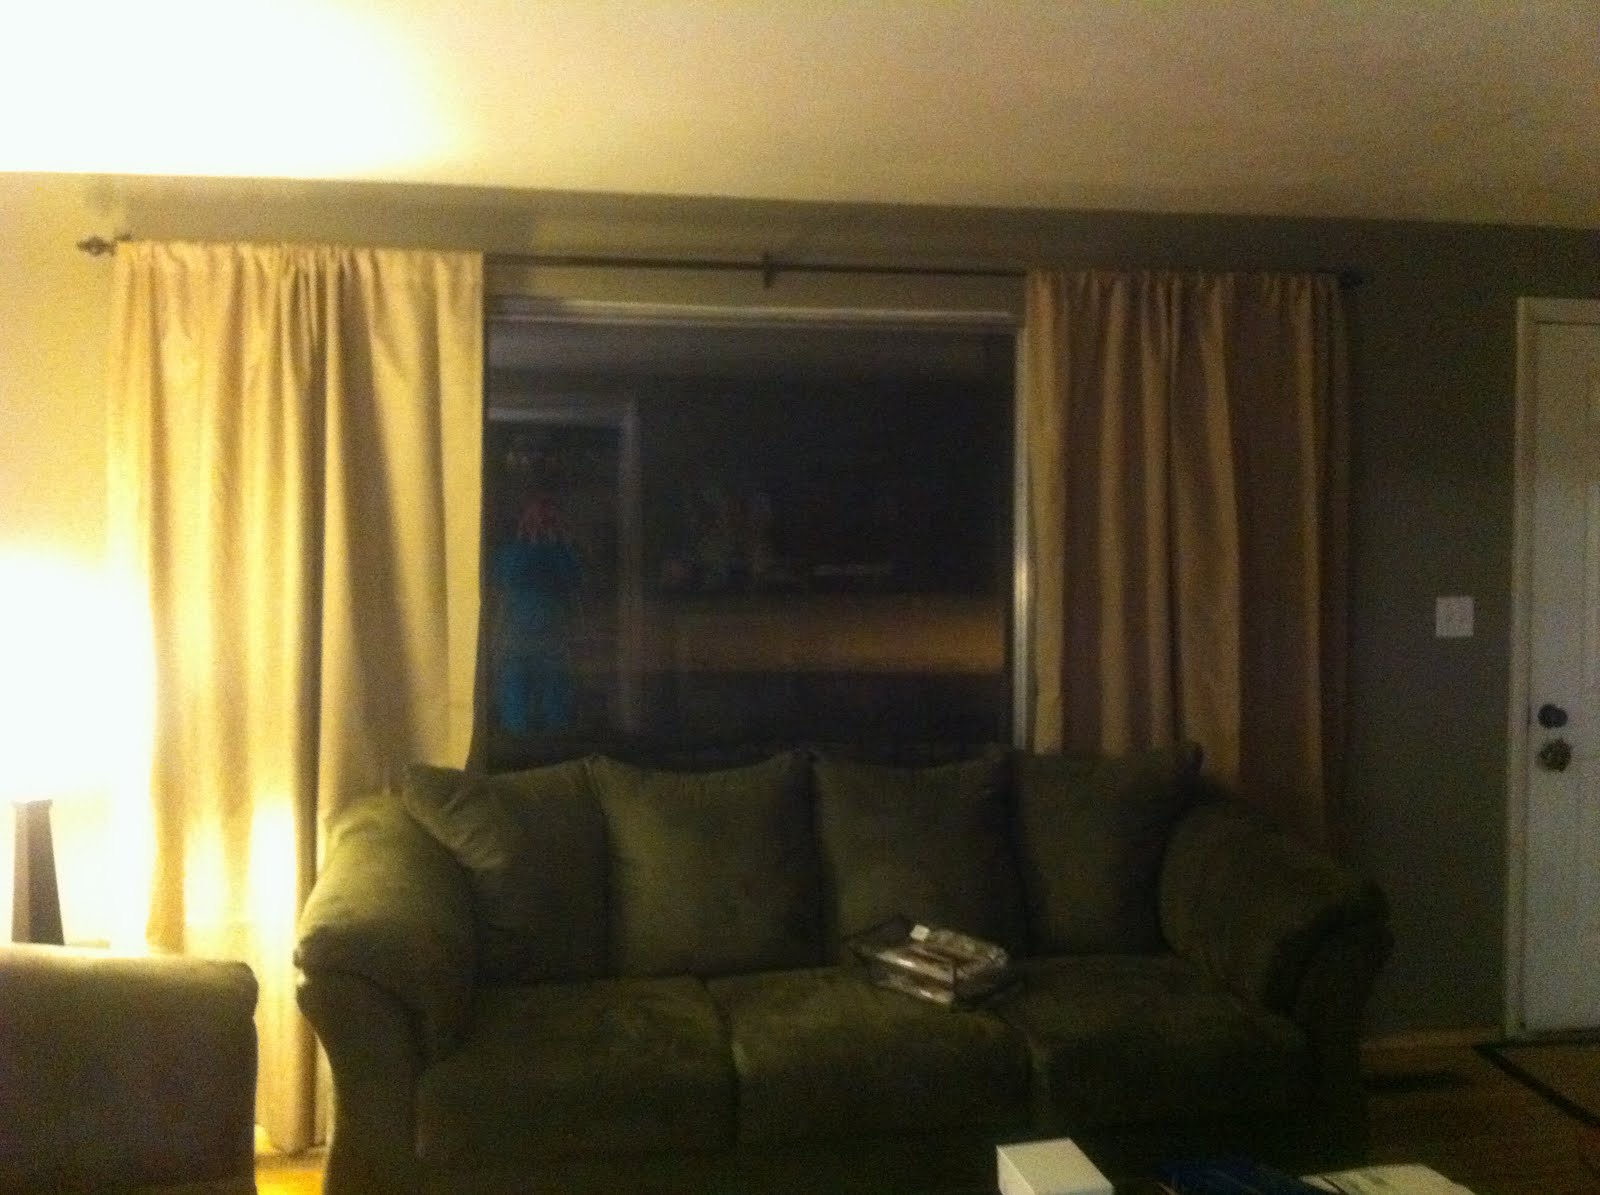
We were able to get the curtain rod up that I got at Bed, Bath, & Beyond up with relative ease. I got the curtains at Tuesday Morning for $20, a good deal in my eyes!
After we got the curtains up, he also helped me put up the beautiful clock that my mother gave me for Christmas. Sorry the pictures are blurry! They are from my phone and I was apparently rather shaky.
Sometimes a little help is just what I need to help move things along.
I've lived on my own for over 5 years of my life. Yet, in all this time, I've never bought and decorated a Christmas tree. This year I decided that as my first Christmas in my house, that I would finally make the investment of having some Christmas spirit on display.
My roommate Britney was very excited. On the Friday after Thanksgiving (during the middle of the day, none of the midnight black friday shopping ridiculousness) we went to Walmart and picked out the tree, ornaments, and the topper for the tree. Here are the pictures of our tree!
Out of the box and in some dire need of "fluffing"
It's starting to look like a real tree :)
Pre-lit trees = WIN!
Gold ribbon on with the lights
Ornaments on without the lights. I swear there are a lot of ornaments on there, it just doesn't look like it in this picture.
Decorations up, lights on, DONE!
I'm very proud of my cute little tree. I can't wait to start wrapping presents so the base of the tree doesn't look so lonely.
"Many of life's failures are people who did not realize how close they were to success when they gave up."
It's been well over a month since my last post. I got bogged down with work and visitors and parties and the holidays and... and... and... I started taking the couch apart about a week before Halloween. After many tedious hours pulling out staples and only getting the skirt off, I realized that I would not be able to get the couch done before a weekend filled with wonderful people coming to see the house. So I stopped at the skirt, leaving the couch functional, swearing to press on once the holiday was through.
After Halloween I did start tearing apart the couch again. I do have high hopes that taking the couch apart is much harder than putting it back together. The process of pulling out all of the staples is rather difficult! I severely underestimated the time and effort that it would take. On more than one occasion my hands were cramped and scratched from all of the tugging and pulling.
In fact... as more time was spent taking the couch apart, the more I thought about taking it to a reupholster to have it finished. I had made it most the way through the couch but couldn't figure out how to get the base removed without destroying everything. Surely it would be significantly cheaper with all the work I had done and the fabric already purchased... Right?
I'm happy to tell you that I don't know the answer to that question. Tonight I had no plans but to attack the couch. Much to my surprise, once I figured out how to take the bottom off it was actually really easy. My couch had been sitting mostly unfinished for weeks. Had I realized that all I had left was about two hours of work, then I would have cracked down much earlier and gotten through it.
I'm glad I didn't quit when I was so close to finishing. Granted, I still have a lot more to do, I'm quite happy that I made it over the first major hump of this project. Here is a slide show of the process of taking the couch apart. Each time I removed a piece of fabric I would take a picture and put it in the slide show. Here is my little demolition show:
Now some reflection for taking apart a couch...
#1 You won't know, but you will learn as you go.
Before I started this project I did as much reading online as I could. One thing that really hated hearing was that each piece of furniture will tell you how it's put together. I wanted to know and be prepared going into it, but I wasn't and anyone else that is contemplating doing their own upholstery, you won't either. As you take each piece of fabric off, you see how your individual piece of furniture is put together. There really is no "way" to do it. You just sort of have to take the plunge to see what you are getting into.
#2 Use leverage to work smarter instead of harder.
Removing staples is a total pain! All I can say is that leverage is your best friend. Don't try and pull a staple straight out. Don't try and put a flathead screwdriver straight under it to pry it up. Remember to use your angles. Use a corner of the screwdriver to get underneath the staple and shimmy it until it lifts. Use some needle nose pliers to pull it the rest of the way out. Instead of pulling it straight out, twist one side out and then the other. It will save you a ton of energy... promise.
#3 Ripping isn't illegal.
The next thing I had read in blogs was not to rip the fabric off the furniture. This seemed pretty self-explanatory, so I took great care in removing every staple in the beginning. One thing that I learned is that you don't want to rip the fabric, but once you get a good amount of staples out, you can pull the fabric and it won't rip. In fact, there were many staples I couldn't get out with the tools, but when I gave the fabric a nice tug they came right out. Once I figured out how many staples I could take out and then rip the rest, then I really started saving time! Just be careful, because this fabric is the pattern for your new couch and you want it to remain as intact as possible.
Some other things...
Another thing that I did was keep a vacuum close by. There is a lot of nasty crap that falls in couches and I was often ripping into something and having a mess fall out. Keep a vacuum close by and clean up as you go. I wouldn't make a rule out of this or anything, but I'm OCD and think it's kind of gross not to...
This part is going to take time, so just remember to be patient and not give up on yourself. I probably put in around 15 hours to take this couch apart. Plus I got a lot of slivers and scrapes in the process. It's not always pretty, but it is completely doable by anyone with some will power.
I do have a couple challenges ahead of me:
(1) There is one board in the back of the couch that has some damage that will need to be fixed. I'm not sure how I will fix it, but it is something that I will have to address before I recover the couch. I may or may not have to actually seek out an upholster for some professional suggestions.
(2) I absolutely do not want to put a skirt back on the couch. Not only are skirts kind of dated, but they really make taking a couch apart super difficult. It was one of the most time consuming things I had to do and it was a decoration. However, there was black fabric on the bottom that was covered by the skirt. So basically I will have to reinvent a new pattern for some pieces of the couch so that I don't have to do a skirt.
(3) Sewing... I am going to have to sew for the next part of this project and the last time I sewed was in 7th grade. That was half my life ago so that is kind of scary right now. I have faith and youtube videos, so I'm hoping I will make it :)
I've finally got all of the furniture items completed for the office! I still have decorating that needs to be done, but that can wait until I finish the reupholstering in the living room. I'm very pleased with how the office has turned out and will be very excited to finish it. One thing that I have learned is that the details really do make a big difference in a room. The office now has all the furniture, but is yearning for it's details to complete it. I'll get there... I have to pace myself. Mostly because of money, but we all have our constraints!
I can now welcome guests to come stay at my place, because I have a futon that is actually pretty comfortable (plus I have extra padding to throw on it). I inherited the futon from my mother. My youngest brother had been using it for a bed, but then it was decided a real bed with a real mattress would be best for everyday sleeping. I agree! So I went down to Salt Lake with her to pick up his new bed and took the futon of their hands!
Now, this futon has been around for a while and was in the need of some rehabilitation. The support bars were struggling and the futon cover was quite dated. Free, however, was the right price and I was pretty sure it could be rehabilitated. I don't have a before picture because I received it taken apart. Here are a few shots that I took.
Terrible green plaid pattern
Wood ends that I sanded down and painted black.
All I can say is that I'm terribly sick of painting. One thing I would recommend to DIYer's is to plan projects with variety in mind. If you have a few painting projects, try and space other projects between them. I found myself caring a lot less about this paint job than when I did the coffee table and entertainment center. I had ran out of paint and did have to buy a new bucket, so now I'm set on paint for future projects if I need it.
One of the support bars needed to be welded again, but the other was sort of beyond repair. So I (really it was mostly my parents, but we all did it together) replaced the second support bar with a 2x4 cut to the right length. Once we got everything back together, then I had to buy a new futon cover. I'm not a big Wal-mart shopper, but their futon covers are great. I love the color and it was super easy to put on.
So here is the view from the door before the futon...
...and after!
The pillows I already owned and picked the color scheme so that I would be able to reuse them. I'm really pleased with how the project turned out and am glad to have the extra bed for visitors.
Financial Breakdown:
Futon: $FREE Paint: $11 Cover: $30
Total Cost: $41
Cumulative Office Cost: $131
I do still have some details to attend to, but won't exceed $200 for the entire room. Hopefully that frames some pictures for me, gets a rug, and an office chair. We'll see how awesome I am at being frugal.
So I'm doing what I swore I wouldn't do... pausing one project to start another! This is how you end up with a million projects in process and none of the complete. I originally wanted to do one room at a time because then if I failed to complete one project, it would only show in one room... not scattered throughout my entire house.
Here is the story, I was cruising right along with the living room and got down to buying a new rug and reupholstering the furniture. Granted I was probably looking to find a reason to procrastinate, but my next room to attach was the office/guest bedroom. So I've been looking for a new bookcase, desk, and some sort of sofa/day bed for company. Well since I do all of my shopping via KSL, all of the things I needed sort of fell into my lap sooner than I expected. So I had to pause on the living room and move on to the office so that I could pick up the new furniture and move it in.
All I can say right now is that everything is a mess! I have old furniture and new furniture all over the house and really, the mess is driving me insane. Things are coming together in the office, but it's not quite like I envisioned and I'm having a hard time with that. Hopefully when it all comes together, it'll be more satisfying.
To start, I need to get some pictures up of the office before. Then as each piece of the office is completed, then I will have an individual post on that item. The office won't be near as much DIY work as the living room since most of it is new furniture, but some of it does need some work.
Warning: for those of you that know me, the state of this office may shock and appall you. I have found that when you are dissatisfied with the function of anything (a room, system, etc) you are more likely to let it get messy. Since I have started the redecorating of the living room, it doesn't hardly ever get messy. So, to put things succinctly, the office was a disaster! See for yourselves:
View from the door into the office...
The opposite wall...
The small bookshelf...
The desk and filing cabinet...
As you can see, this room is an absolute disaster area. The action plan for the office is as follows:
-Replace desk with a modern black one with no hutch -Get a larger book case, also black -Procure storage containers for the book case -Find a decent futon/guest bed -Frame photos from Michelle to go above desk -New filing cabinet?
Just so everyone knows, I do not have an obsession with black. However, in many places I have lived, my living room and office area have been in an open layout and visible to one another. If this happens, I want to furniture in both rooms to match. That way I don't have to redo things later. Besides, black is just a really good neutral that you can use to create a variety of modern color schemes. Not a black lover (my favorite color is grass green), but I'm still a practical girl at heart.
The majority of furniture is purchased, but the conversion process still needs to be finished. More posts *hopefully in the near future*, when things are complete.
I've really outdone myself and completed most my projects in two weekends. This is good and bad at the same time because now my living room is starting to come together, but then I'll have to start reupholstering soon. I'm still pretty terrified of that conquest, but have gleaned much bravery in completing so many other tasks before hand.
This picture wasn't hanging up, so I need to start by showing everyone so a proper before and after can take place. This picture matches my awesome couch :)
I actually don't think the picture is terrible, but it's just not my style. For the mirror transformation to take place I needed a screw driver, razor blade, drop cloth, spray paint, and mirror glass. In a previous blog I already had purchased the spray paint, but one can is usually only a few dollars. I'm also incredibly lucky and my dad provided the mirror glass since him and his wife run a windows business together. Those can cost around $50, however, you could see if trading in the picture glass would yield any discounts.
To start, unscrew the wiring from the back of the mirror. Then cut through any paper backing the picture might have (not all do, but this one had a brown paper glued to the back). After that, most pictures are held in place with a lot of little metallic fasteners. Take a flat head screwdriver and bend them up so you can get to the picture. **Note** It seems like these fasteners are set after the glass and picture are in place. Cardboard backing and picture should be easy to get out, but the glass can be difficult. I had to get one side out and literally slide the rest of it out. Be careful not to break it! Measure the glass to make sure you get the right size of mirror. The piece of glass was slightly larger than 2'X 3', so I had my dad cut a 2'X 3' exactly and it worked perfect! Thanks dad and Julie!
After all the contents have been moved from the frame, take it outside, put it on the drop cloth and spray away! Note that putting on multiple coats with spray paint can be different than regular paint. Instead of waiting at least four hours between coats, you want to wait either LESS than FOUR hours or MORE than THIRTY SIX hours. No in between.
After the coats have dried (usually within the hour), then insert the mirror glass into the frame. I haven't done this yet, but will the next time I can get over to Lowe's... but it is recommend that you secure your mirror in your frame with silicone. You have to be careful with what kind you get, some of them are "cured" and will eat the silvering off the mirror. Get an uncured silicone and put it one inch out from every corner. Make sure to rub it in to the crack of the frame. Put the cardboard backing in and push the fasteners down. Then you can reattach the wire and you are done! It's really quite an easy project.
Here are some of the final pictures. Unfortunately, none of them really capture how great the mirror looks. I was having a hard time finding a good shot. So here are a few, but you may just have to come look at it in my living room. :)
There isn't any financial info this time, because all of the supplies were already purchased. The total cost so far of all my projects is currently $105. Not bad for my budget! Thanks again for reading :)
This weekend I finished another two projects! *crowd cheers* This post will just be about one. I didn't plan on moving though some of my projects so quickly, so I'll be putting my second completed project into another post. This weekend was focused painting my entertainment center. While this project may or may not add a huge impact to the room as a whole, it was a significant change for this individual piece of furniture! I'm very very pleased with it's outcome and hopefully so will all who happen across my humble little blog.
I had inherited this entertainment center from my mom when they purchased a big screen tv. It was a nice piece of furniture with a great solid wood structure. I liked the piece, but it didn't really "speak to me" or my personality. Here is a picture so we can all start on the same foot.
This picture makes it look like a jumbled mess... which it sort of was. I'm looking for more modern, simple look. Now since this piece was stained, but not finished, I didn't have to do any sanding. (Hallelujah!) I'm very glad because painting this turned out to be a bigger project that I originally thought! I was able to use the paint brush and the remaining paint to put on two coats. As a note, I easily could have put three coats on and it probably would have looked better. The problem was (1) I ran out of my free paint and (2) I just wanted to be done! Since there was so much surface area each coat took hours to put on.
One thing I did learn is to work from the inside out, not the other way around. If you are painting an item with cubbies and what not, start insides the cubbies on the very top, then do the sides, then do the bottom. This entertainment center has four main cubbies, the small one on the upper left hand side was particularly difficult to get into and paint. After all the inside parts are done, then move to the outsides. Maybe that is a no brainer, but for my first coat I did all the large surfaces first and the small ones second... it was much more difficult. Anyways! Enough with the blabbering, here are the pictures and cost break down:
All clean with the doors taken off, ready to be painted!
After the first coat, which didn't cover very well. Gotta love that since I don't have a garage that my kitchen gets turned into a construction zone for every DIY project that I do.
Now feast your eyes on...............
THE FINISHED PRODUCT! Seriously, scroll up to the top of this screen and look at the before shot. Now it looks a million times better! I opted not to put the doors back on because smoked glass is pretty dated and the open look is much more modern. While the actual renovating of the entertainment center was free, I did buy a few decorations to add to it. Here is the cost break down:
Nesting boxes: $9 each, purchased at Tuesday Morning Green candles: $7 for both, purchased at Hobby Lobby Picture board: $8 purchased at Hobby Lobby
Total cost of the project: $33 (decorating items)
The wonderful candle holders came with the end tables from Vic and Christie. I still owe them dinner for that... The reed diffuser was a birthday present from the wonderful Felicia (Fish) and it smells FANTASTIC! Thanks for listening :)
Since many of you have never been to my house, few of you really know what projects need to be done. To remedy that, I have taken some nice "before" shots of my living room with the changes that I would like to do in order to update the space.
To start, we will take a look my living room. This is a shot looking straight in from my front door. Most of these pieces I inherited from my mother. The couch, wing back chairs, and the lamps were from her. All of these pieces are really high in quality, but the fabric/style just doesn't match up with what I am looking for. The coffee table was given to me by my wonderful friend Michelle (aka Shelleepants). If I remember correctly, this table was her brother's that he was getting rid of. Lastly, the two end tables were given to me by Jake's cousin, Christie. The end tables (which sadly can't be seen in this picture) are what inspired/motivated me to change the rest of the room.
This next picture shows the entertainment center that I have on the opposite wall of the couch. Another quality piece that I inherited from my mother that is solid wood. The last photo is of a picture that my mother had hanging over the couch. I received a veto on hanging the picture up as it would make the room feel like a "grandma's parlor".
Never fear! I have a plan for all the pieces in this room and subsequent blogs to follow the transformation of each piece. Pictures of the overall room will be posted to gauge the overall impact each item has on the room. So here is the recipe of the redecoration: (starting simplest to most complex)
Replace lamps
Purchase modern rug
Repaint coffee table black to match the end tables
Turn floral picture into a classy mirror
Repaint entertainment center black to match the coffee/end tables
Reupholster wing back chairs
Reupholster couch
I actually already have 1.5 projects completed, so another post should be expected shortly to show the progress there.
Well there you have it! That is my living room that I will be changing up with some DIY projects. Let me know if you have any ideas for me to throw in or to make the process any easier!
For the most part, I have been against starting my own blog. Blogspot seemed to be something that you started when you got married or started having children... like a perpetual newsletter. I found this wonderful to keep tabs on married friends and family, but didn't think I had enough going on in my life to constitute my own space on the intraweb.
At the constant prodding of a dear friend of mine, I began to consider starting a blog. She had one and she wasn't married. The biggest factor in my decision to start this blog was deciding to redecorate my townhouse. Over the years I have inherited a vast amount of free furniture. I have greatly appreciated all of these pieces during my college years, but now that I have a grown up job I decided to start living in a more personalized space. So I want to start changing things around my house to be more of a reflection on me as opposed to the people who originally bought the furniture.
Some of the projects will be as simple as painting and replacing some small decorative items. Other attempts will be much more difficult like reupholstering and reupholstering... and sewing (Yeah that's hard for me, I don't know how to do that shenanegins). Did I mention reupholstering? I'm slightly terrified of this project and will need all the advice and help this internet world can give me.
I'm on a budget for all this redecorating. So most my purchases are going to be made through the wonderful world of KSL classifieds. I'll note my efforts and expenses, so that if anyone else is considering some DIY attempts, they can glean some bravery and knowledge from my many attempts. The focus will be two rooms: family room and the office/guest bedroom.
To many adventures ahead,
Boomba
PS: For most that know me, boomba is going to be a new term. This is a nickname I have, but only from one person. Zookie is one of my closest friends and has recently left the state of Utah to serve our country in Korea for the next year or so. I won't get to talk to him much, so this blog is also to keep him informed of the latest and greatest in the life of McKell. :)