Tuesday, November 30, 2010

A Christmas First

I've lived on my own for over 5 years of my life. Yet, in all this time, I've never bought and decorated a Christmas tree. This year I decided that as my first Christmas in my house, that I would finally make the investment of having some Christmas spirit on display.

My roommate Britney was very excited. On the Friday after Thanksgiving (during the middle of the day, none of the midnight black friday shopping ridiculousness) we went to Walmart and picked out the tree, ornaments, and the topper for the tree. Here are the pictures of our tree!


Out of the box and in some dire need of "fluffing"


It's starting to look like a real tree :)


Pre-lit trees = WIN!


Gold ribbon on with the lights


Ornaments on without the lights. I swear there are a lot of ornaments on there, it just doesn't look like it in this picture.


Decorations up, lights on, DONE!

I'm very proud of my cute little tree. I can't wait to start wrapping presents so the base of the tree doesn't look so lonely.

To starting your own traditions,

Boomba

Monday, November 8, 2010

The Joys of Homeownership....

Don't get me wrong, I love my house. I've worked very hard on it and wish it would finish itself, but I think it was an investment and a learning experience that money could not buy. That being said:

MY HOUSE IS MISBEHAVING!

The beginning misbehavior was this summer when we discovered the furnace was no good. That was a $2800 expenditure. Not only that, some of the people that kept staying at the house would play with the AC which resulted in it causing the freon to freeze and the freon drain. So then the air wasn't even cold after it was fixed, however, it is working very nicely for winter.

This last week my I noticed that my drain in the laundry room was acting up. We'd run a load of laundry and it would back up. After a while it would slowly drained, but then it would leave terribly gross stuff on the floor. This happened once and then didn't happen again, but then it got worse and worse. Every time we tried to do laundry, then the dishes, then showering. After a while it started backing up through the bathroom in the basement as well. The house smelled all mildewy and it was no good at all.


I tried Drano and a Brandt plug, but neither remedied the situation. I had to call in a plumber from Roto-Rooter. Ended up being the roots from my yard had grown into the main line going out to the sewer. So they had to snake all of those out and then informed me that the main line was in rough shape and that I'd need to look into replacing it in a few years. Joy....

While he was cleaning up all of his tools, then he noticed this gem of a find.


Yeah, the toilet upstairs had a leak and had been leaking for quite some time. Since no one uses that bathroom, no one noticed the tumor growing from the ceiling. So he had to reinstall the toilet correctly and then there was a leaking fitting in the ceiling that he had to tear into and replace. As I sit here now he is out there tallying up my bill. We are at a minimum of $355, plus parts and tax.

I guess I should just consider myself lucky that I have the money for this and that I'm lucky not to have to touch my savings to cover it. I have a job that takes very good care of me and enables me to live a good life. Without these frustrating times in life I would not understand or appreciate the peace.

To biting the bullet,

Boomba

Saturday, November 6, 2010

I'm not dead!!!

After moving in and getting settled I definitely needed a break from home renovation projects. It was a good thing too, because then I started traveling for work for about 3 straight months. A lot has changed in the last little bit and I'll just say that I have some more time to focus on stuff around the house.

I picked up trim for the doors a long time ago and my parent help me cut it. I borrowed Jack's paint sprayer to paint it all, but the sprayer ended up being broken. :( Frustrated I set the project aside for a while. this last week I got up some motivation and decided to paint the trim.


My painting station I build with my new saw horses :)


Trimless door


First piece up! I can do this...


The finished product! Man I need to paint the door now.


Got the pantry done too!

I used the compressor that I still have borrowed from Jack. Don't worry, I borrowed it about this time last year for the couch re-upholstery project. Luckily he hasn't really needed it, so it's been able to stay in my possession.

I used the finish nailer to get all the trim up and then went back over the nails with white, paintable caulk. Then I used some liquid nails on the corner blocks. I don't even have all the doors done... but I did get 3/15 done. I'll get there. Slowly but surely!

To getting back on the saddle,

Boomba

Saturday, July 24, 2010

Now I can live in my Living Room

This blog is rather late, because I got this furniture on the weekend of my birthday. Two weeks later I am finally getting around to blogging about it. It is kind of sad because I had the refinished futon and almost refinished couch in the living room. It just sort of looked sad and ghetto.

What will I do with the couch I worked so hard on? I haven't decided. The futon is going to my little brother (if he still wants it) and I'm rather enjoying the opportunities to give some of my old things to my newly moved out brothers.

Here are the pictures...


When you first walk in, this is what you see. I'll eventually change the layout of the room once the fireplace is done.


On your way to the kitchen, this is the view from the pocket door/stairs area.


This is the view from the kitchen.


The end tables match the coffee table as far as style goes. Don't get too distracted by the rug. I love these tables!


These couches are really comfortable and were a steal of a deal. Picked them up at Knight Furniture in Riverdale. I love being in this room now! It still needs trim, curtains, and some pictures, but one step at a time!

To good naps on soft couches,

Boomba

Sunday, July 18, 2010

I have this thing about beds...

A lot of people say home is where the heart is, but technically you never leave your heart anywhere. I've always been rather attached to my bed and whenever I travel I always miss my bed the most. I just don't sleep the same on other beds. When I was remodeling the bedroom, I got a new bed frame, but kept my mattress/box springs.

So now that the house has a new bed it has sort of made things more official for me. Maybe I am weird and beds are just beds, but for me it's the cornerstone of my home. So here are some pictures of the bedroom now.


Here is the new rug I got a Lowe's for the bedroom. It was only $25 and I love it! The rug kind of has all the colors I want to focus on in the room. Right now there are a lot of neutrals in the room with the espress/black, grey, tan, and whites. I'm usually quite colorful, so this is a definite departure.


The new bed has a leather headboard and footboard and sits rather low to the ground. After getting the new bed I had to update my bedding. I found a down comforter set at Ross that included the comforter, two down pillows, and a duvet cover/shams. I didn't want to use the duvet cover because I thought the bed would be too dark. I like contrast, so I left the duvet as a blanket by itself to use since the house is so hot.


Don't mind the fans... the furnace doesn't work, which means the AC doesn't really work either. Since I remodeled the living room (pics to come), I was able to use the old end tables and lamps in the bedroom, which match the bed really well. You can also see the floors in this shot. In my entry What Lies Beneath, the floor in the picture is this bedroom floor.

To having a place to put your head,

Boomba

Saturday, July 17, 2010

Functioning Kitchens = Happiness

It's been over a month since I have blogged and I do apologize. Finally getting back into a semi-regular life style kept me from blogging. There still is quite a bit to do, but things are really coming along. Here is the kitchen in it's remodeled state:


This cook top was actually a freaking nightmare. The concrete counters were done before I got the cook top, but then whole ended up not being big enough. So Jake spend like 8-10 hours using a circular saw, sawzall, and a grinder trying to get the hole big enough. After that was all said and done, then there was a TON of dust to clean up. Now that it is in and functioning I can completely repress that experience from my mind... cause it sucked!


Here is the new hood with the new Jenn Air electric stove top. I got them both through KSL. The hood was $60 and the stove top was $100.


Here is the new sink and I absolutely love it! I got the sink at Lowe's and the faucet on Overstock.com. Needless to say, it looks tons better than the old stainless steel sink that was in there before.


View from the kitchen into the dining room. I used part of my tax credit that I got back to buy it. Thank you Uncle Sam! I got the dining set at Bed Heaven in Layton. Now I just need to decide if I want to put a rug underneath it... Also, in this picture you can see the new wall color.


If you don't remember what the old kitchen looked like, click here. Here is the view from the dining room into the kitchen. The concrete counters are waxed and the wine glass racks are installed. My mom and Wes go the dishwasher running. I'm really thrilled with how the kitchen is looking (and functioning)! There are a few projects left like putting the trim up, getting pantry door back on, and getting the bead board on some of the cupboards.

To finally being able to use my kitchen all the way,

Boomba

Sunday, June 13, 2010

Appliance Update

First and foremost can I just say I AM MOVED IN!!! This weekend was it, I HAD to be out. Thankfully, I had a lot of help. My parents, my sister came up from Provo, Leah, Jake, the Relief Society, and one guy from the Priesthood (way to rep Nate).

So from here on out, I'll be catching up on blogs and finishing a lot of unfinished work around the house. Currently I don't have my dryer, dishwasher, or cooktop hooked up. There are still lights that need to go up and a plethora of things to get done. *sigh* It'll get there...

When I first moved in there was a terrible wall oven that we took out. I found my new double oven at the ReStore for $125. Lets skip to the goods; here are the pics!
Old oven taken out. It was set up to be a wall oven with a built in microwave over it. So we had to modify it a little bit in order for it to work.

We (meaning Wes and Jake), cut out the shelf and got it to fit the oven size. Don't be fooled, it's not as easy as I make it sound. It took them around four attempts to get it in there. All sorts of things went wrong and there was wall cutting and duct tape and sweaty boys and ....... Lets just say that it took about four hours.

Personally, I think their effort was entirely worth it. Now I can make enchiladas and cookies at the same time. Oh, and top oven is a convection oven. Anyone know how to adjust the time for convection ovens?

To new kitchens to cook in,

Boomba

Friday, June 11, 2010

I'm thankful for running water

So this post is going to have a ton of pictures. It's really like three posts in one: the bathroom floor, the shower/tub, and the vanity projects. I'll keep my captioning short so this isn't a novel.


Britney removing the trim after the old vanity and privacy wall have been removed


All the linoleum stripped off the floor


Hardy Backer going down


Tile down


Tile, paint, and new vanity in. Sorry, my bathroom is long and skinny so these pictures aren't super interesting.


Nasty old tub


Sheet rock taken out of the shower surround


Tile up!


New faucets


Not much of a picture, but this was the old vanity and you can kind of see the privacy wall. Wes was super gung ho and started taking it all apart. My camera and I couldn't keep up.


I found a vanity I liked at Lowe's, but it was $400. This old, ugly dresser was $50 on KSL Classifieds. The ugly dresser was more in the budget, but I'll make is sexy... don't worry!

The drawers

Dresser painted and new sink installed!

My running water in my b-e-a-utiful sink!

I still need the drawers put back in the vanity. Sadly, the dresser is so old that the handles are a weird size. So I'll need to get some custom, but I'm not sure where I can do that. If anyone has any contacts for that, let me know! I also need a new light for the bathroom. The problem is, the light box is center to the OLD vanity size. To be center for the new vanity it needs to be about two to three inches over. *sigh* So I'm working on the light situation still. It's starting to look really great though!!! It's move in weekend, so it's crunch time to get everything functional. More blogs to come, when I get some time!

To being able to wash my hands after I ... I'll stop there,

Boomba

Sunday, June 6, 2010

What Lies Beneath


This is me sitting on the current master bedroom floor. See all that white? Yeah the prior owners decided to paint everything and get carpet. So all of these wood floors were covered in it. This is me going around and pulling up all the staples I could find.


When you strip off the paint, here is what was hiding! Removing the paint was seriously a daunting process. I got two rooms completely stripped, but it took three people each and about 5-10 hours a room. I didn't really have that sort of time, so I ended up sanding the paint off the other two. Much easier! However I did still have to go around the edges to get the paint off. I went through lots of different methods to remove the paint: various paint strippers, Goof Off, and mineral spirits. What I recommend? Sanding, then getting what is left with Goof Off and steel wool. I read some things that said not to use steel wool, but it was all that worked. I guess we'll see if my floors rust.


Meet the buff sander! Ridiculously easy to use and fairly cheap to rent at Home Depot. For $50 a day you can have this for 24 hours. I had about 1200 square feet to do and this was plenty of time. The sand paper is the biggest expense, but get what you have to. Don't skimp!


Putting varathane on the floor... also super easy. I bought a water based, satin varathane that is about $50 a can. I've used one and half, but still need to do the hall. It says it only covers 400 square feet a can, but mine went way farther than that. I HIGHLY recommend using this product to finish your floors. Way easy to use!

I bought three types of applicators: a deck stain applicator and two different kinds of lamb's wool applicators. Consensus? The all work the same. The two lamb's wool applicators had longer handles which was convenient. Deck stain applicator was a hands and knees tool. Other than convenience, they were all equally easy to use.


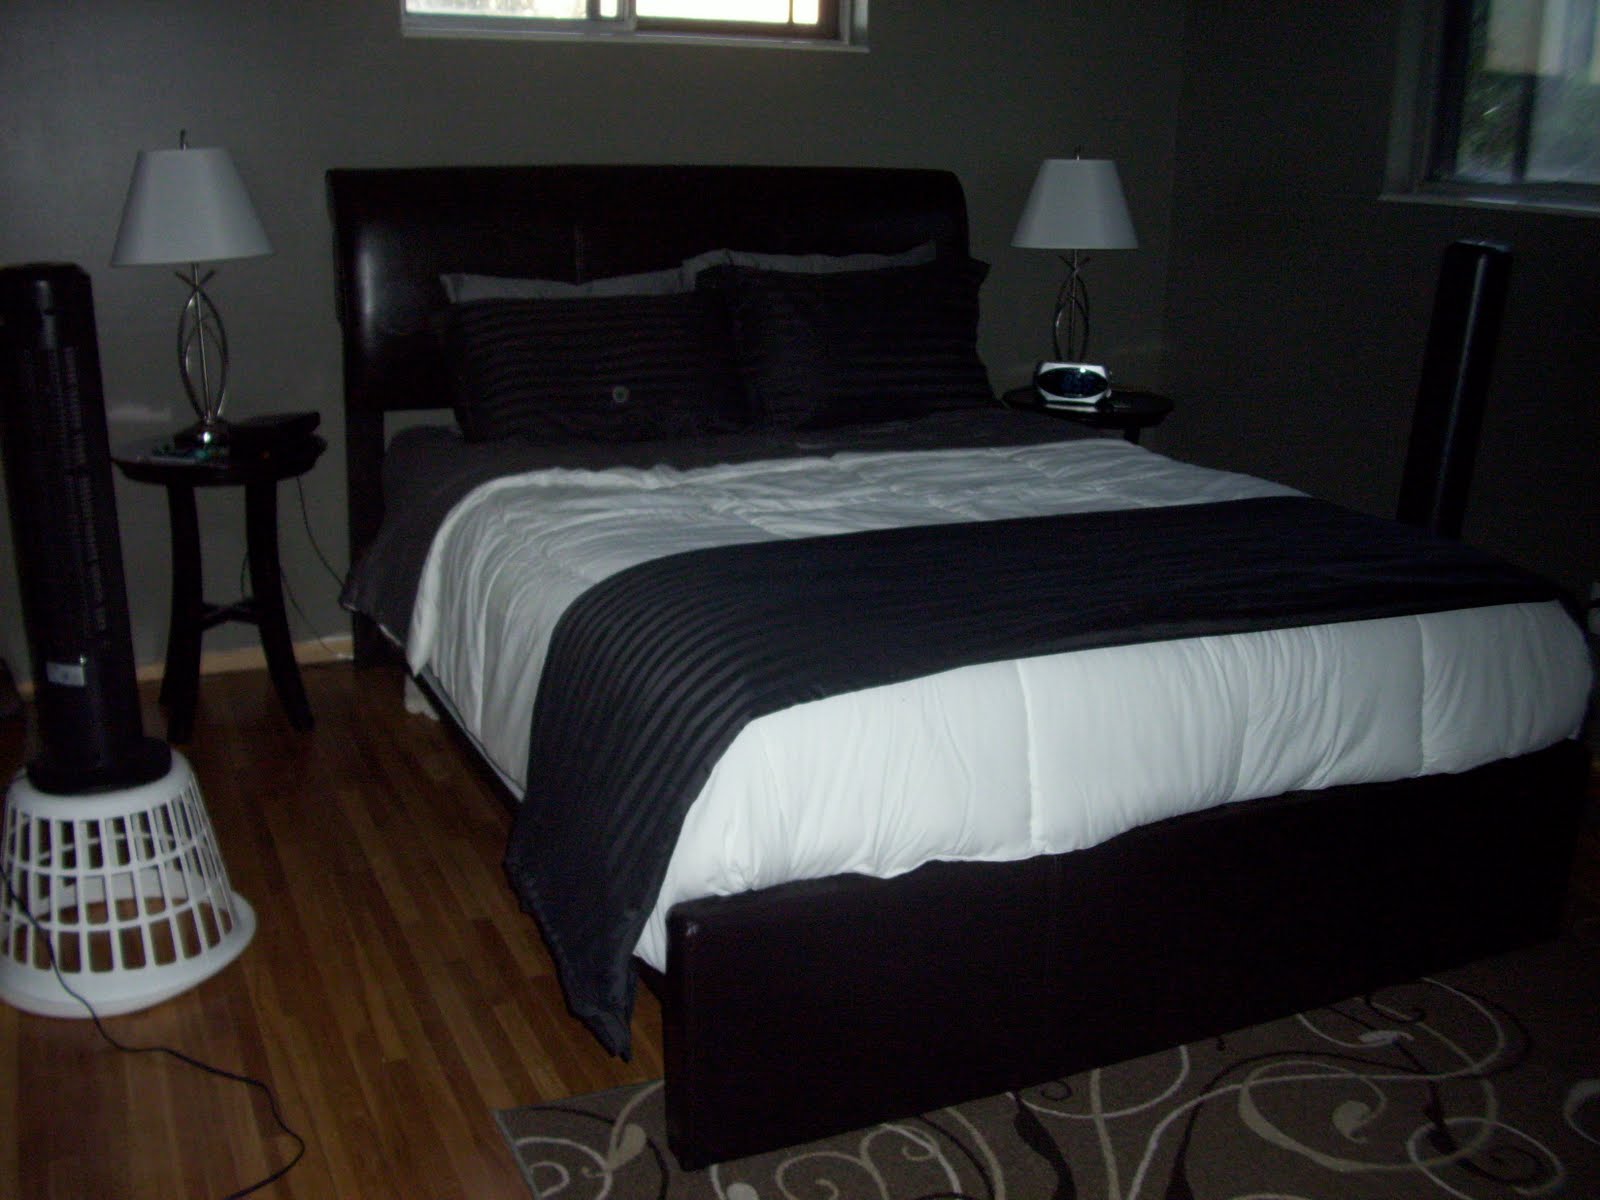
The finished product!!! They look a million times better :) Special thanks to Jake, Britney, Leah, Braden, Shellee, Travis, and Gary for all of their help throughout the floor process. Couldn't have done it without you all!

Are they perfect? No, but let's be realistic... the house is 38 years old and they were trashed. I would have had to pay serious money for them to be perfect. Just in case you didn't know, "serious money" is not what I'd call my budget. Things are coming together and I'm a million blog posts behind. I have to move in this weekend, wish me luck!

To seeing past the surface,

Boomba

Saturday, May 29, 2010

It's starting to come together!

I've been fairly discouraged lately because it has seemed like I have been doing a lot of work, but when I looked in the house I couldn't see it. I saw the individual projects that were complete, but nothing was really "coming together". The kitchen, however, has hit that phase where I can actually see the difference now that I have the back splash complete.

This project had me rather nervous because I usually have my parents take the wheel on tiling projects. They are super lucky and are vacationing in Michigan, so I HAD to do this one without them. I was terrified. Luckily, Jack and Ang came to my aid. He picked up some Bondera and they spent two evenings helping me. It was a frustrating project at times, but I learned a lot. Here are some shots:


Me on the tile saw. (Thanks coworker Brandon for letting me borrow that!) There were some awkward cuts due to the outlets. I only messed up on one piece. So I bought one more box of tile for the job, and used every single piece. I later went back and bought a few extra tiles in case any need to get replace in the future.


You can do it put your back into it! Basically with Bondera you stick it to the wall, then stick the tile right on it, grout immediately. Some of the pieces were good and didn't move. This was a more difficult piece and Jack really had to put some pressure on it to keep it from slipping.


Talk about teamwork! This was another difficult piece and yes I am in the sink area.


Tiles up and ungrouted


Tiles grouted


This is the finished product! Everything is up and grouted! When I took this picture I really thought, "Wow, I'm starting to see it!" Once I get the counters stained, the walls painted, and the appliances in... it'll look good! The end is in sight, well... at least for the kitchen.

The project wasn't terribly difficult and took about ten hours. You can do it with two people, but it was way more convenient to have a third. Once person to hold the tile up, one person to do the spacers and level, then a third person to do the flashlight and help peel the Bondura back. It can be done with two people, Britney helped me yesterday to finish. I'm very satisfied with the project and it's definitely made me MORE motivated to dig in and get things done!

To great friends and all of their help!

Boomba