Saturday, May 29, 2010

It's starting to come together!

I've been fairly discouraged lately because it has seemed like I have been doing a lot of work, but when I looked in the house I couldn't see it. I saw the individual projects that were complete, but nothing was really "coming together". The kitchen, however, has hit that phase where I can actually see the difference now that I have the back splash complete.

This project had me rather nervous because I usually have my parents take the wheel on tiling projects. They are super lucky and are vacationing in Michigan, so I HAD to do this one without them. I was terrified. Luckily, Jack and Ang came to my aid. He picked up some Bondera and they spent two evenings helping me. It was a frustrating project at times, but I learned a lot. Here are some shots:


Me on the tile saw. (Thanks coworker Brandon for letting me borrow that!) There were some awkward cuts due to the outlets. I only messed up on one piece. So I bought one more box of tile for the job, and used every single piece. I later went back and bought a few extra tiles in case any need to get replace in the future.


You can do it put your back into it! Basically with Bondera you stick it to the wall, then stick the tile right on it, grout immediately. Some of the pieces were good and didn't move. This was a more difficult piece and Jack really had to put some pressure on it to keep it from slipping.


Talk about teamwork! This was another difficult piece and yes I am in the sink area.


Tiles up and ungrouted


Tiles grouted


This is the finished product! Everything is up and grouted! When I took this picture I really thought, "Wow, I'm starting to see it!" Once I get the counters stained, the walls painted, and the appliances in... it'll look good! The end is in sight, well... at least for the kitchen.

The project wasn't terribly difficult and took about ten hours. You can do it with two people, but it was way more convenient to have a third. Once person to hold the tile up, one person to do the spacers and level, then a third person to do the flashlight and help peel the Bondura back. It can be done with two people, Britney helped me yesterday to finish. I'm very satisfied with the project and it's definitely made me MORE motivated to dig in and get things done!

To great friends and all of their help!

Boomba

Friday, May 21, 2010

Like a Rock

I can't remember where I originally saw concrete counter tops. I just always knew that is what I wanted to do in my house. Then when I found out that a family friend did hers and that they looked awesome... well, I could hardly wait.

Concrete? Really? Yeah, it's about a billion times cheaper than granite and can be stained to look just like it. Last weekend the concrete was poured and finished, but they still need to be stained and sealed. Here are some pictures:


Old kitchen counter tops


Framed in with 2 1/2 inch melamine on bottom and 3 1/2 inch melamine on the side. Then the counter tops have to have chicken wire secured to them. This keeps the concrete from cracking.


Everything framed in!


Concrete getting poured in. When you do concrete counter tops, it's best to have it as dry a mix as you can get.


All poured!


Rounding out the edges


This is Matt doing the finishing work. After a few hours when the concrete it set up, then it has to be finished. I don't know much about this since I hired Matt to take care of it.

I'd like to take this opportunity to thank Mason and his parents, Kelly & Kelly, for letting me borrow their cement mixer. It saved mucho time and dinero! I desperately need to pick a stain, but it has to cure a while before I would actually be able to use it. However, there are lots of things around the house I desperately need to do. Has anyone found me appliances yet? ;)

To desperation at its finest,

Boomba

Monday, May 17, 2010

A Steal of a Deal

All new appliances for under $1,000; that is my goal for the house. So far I am doing pretty well. I got the black double oven from the ReStore for $125 and this last week on KSL Classifieds I got a side by side, water/ice dispenser, black and stainless fridge for $475.

So I've spent $600 on my appliances so far, but still need a microwave (back and stainless preferred), dishwasher (can be just black), stove top (stainless gas preferred) and a hood (stainless). Hopefully with some KSL Classified I can scrounge up the rest of what I need within my $400 budget remaining. I can go a little over, but how cool would it be to say I got all the appliances in my house for under $1000?

Here is the latest purchase:


Isn't she pretty? Yeah, I thought so too! Keep your eyes out for some good deals for me :)

To deals that are steals,

Boomba

I was in a coma for two weeks....

Ok, that isn't true. I'm sorry that I lied. Seriously though, I looked at the calendar today at work and almost passed out when I realized that it was May 17th. For reals? What on earth happened to the last two weeks? I seriously misplaced FIFTEEN days. I know I was active and working on the house the entire time, but I must have been in a zombie-like-active-coma. I turned in my thirty day notice on May 13th, so that means that I now have less than a month to be in the house. YIKES!

I keep feeling like I can't make a post until a project is done. I'm sorry, that is the type A in me that wants a perfect entry, start to finish. Most of the projects can't be completely done in a weekend though. So I'm going to start updating the work that has been completed. Here are the pictures of the first main project: tiling the kitchen.


Tearing up the old linoleum floor


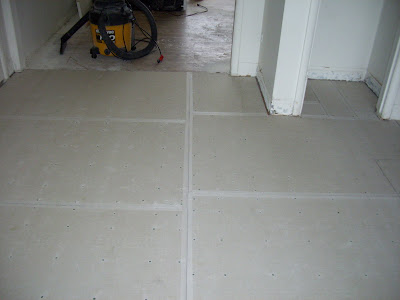
The Hardy Backer down and taped


Glue mixed to start officially tiling


The first piece down *Que Hallelujah chorus*


Dining room tile done, no grouting


Don't let anyone fool you... grouting is the worst part about tiling


Kitchen tile down with grouting

The floor is completely done. The linoleum and sub-floor was ripped out. Any suspicious wet spots were sprayed with mold killer. Hardy Backer, 1/4 inch, was screwed down into the sub-floor and the seams were taped. Mud was mixed, porcelain tile was laid, and grouting was complete. I unfortunately don't have a great picture of the finished product because you cannot mop for at least ten days.

To having 178 square feet complete,

Boomba

Sunday, May 2, 2010

Magic Touch

In one of my previous entries I mentioned picking up some outdoor lights to redo. Can I just say that I could be in Harry Potter's gang with the DIY magic I've got going on right now :) Here was my latest work:

BEFORE


AFTER


All the instructions are in the Brass = TACKY entry. So these lights cost me $10 each. Some similar at Lowe's/Home Depot would be around $60. Faux sho!

To the magic we create in our lives,

Boomba