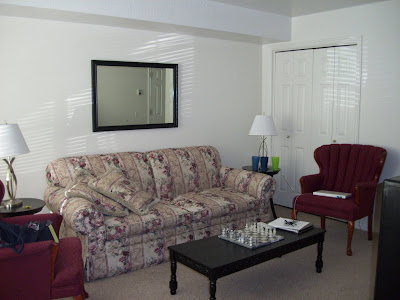
This picture wasn't hanging up, so I need to start by showing everyone so a proper before and after can take place. This picture matches my awesome couch :)

I actually don't think the picture is terrible, but it's just not my style. For the mirror transformation to take place I needed a screw driver, razor blade, drop cloth, spray paint, and mirror glass. In a previous blog I already had purchased the spray paint, but one can is usually only a few dollars. I'm also incredibly lucky and my dad provided the mirror glass since him and his wife run a windows business together. Those can cost around $50, however, you could see if trading in the picture glass would yield any discounts.
To start, unscrew the wiring from the back of the mirror. Then cut through any paper backing the picture might have (not all do, but this one had a brown paper glued to the back). After that, most pictures are held in place with a lot of little metallic fasteners. Take a flat head screwdriver and bend them up so you can get to the picture. **Note** It seems like these fasteners are set after the glass and picture are in place. Cardboard backing and picture should be easy to get out, but the glass can be difficult. I had to get one side out and literally slide the rest of it out. Be careful not to break it! Measure the glass to make sure you get the right size of mirror. The piece of glass was slightly larger than 2'X 3', so I had my dad cut a 2'X 3' exactly and it worked perfect! Thanks dad and Julie!
After all the contents have been moved from the frame, take it outside, put it on the drop cloth and spray away! Note that putting on multiple coats with spray paint can be different than regular paint. Instead of waiting at least four hours between coats, you want to wait either LESS than FOUR hours or MORE than THIRTY SIX hours. No in between.

After the coats have dried (usually within the hour), then insert the mirror glass into the frame. I haven't done this yet, but will the next time I can get over to Lowe's... but it is recommend that you secure your mirror in your frame with silicone. You have to be careful with what kind you get, some of them are "cured" and will eat the silvering off the mirror. Get an uncured silicone and put it one inch out from every corner. Make sure to rub it in to the crack of the frame. Put the cardboard backing in and push the fasteners down. Then you can reattach the wire and you are done! It's really quite an easy project.

Here are some of the final pictures. Unfortunately, none of them really capture how great the mirror looks. I was having a hard time finding a good shot. So here are a few, but you may just have to come look at it in my living room. :)


There isn't any financial info this time, because all of the supplies were already purchased. The total cost so far of all my projects is currently $105. Not bad for my budget! Thanks again for reading :)
To good reflections,
Boomba

love it. it's amazing how black paint can make anything old look good again. it's a great trick.
ReplyDeleteYou did a great job!! I happen to be a fan of your old picture too ;) The mirror looks great :)
ReplyDelete